
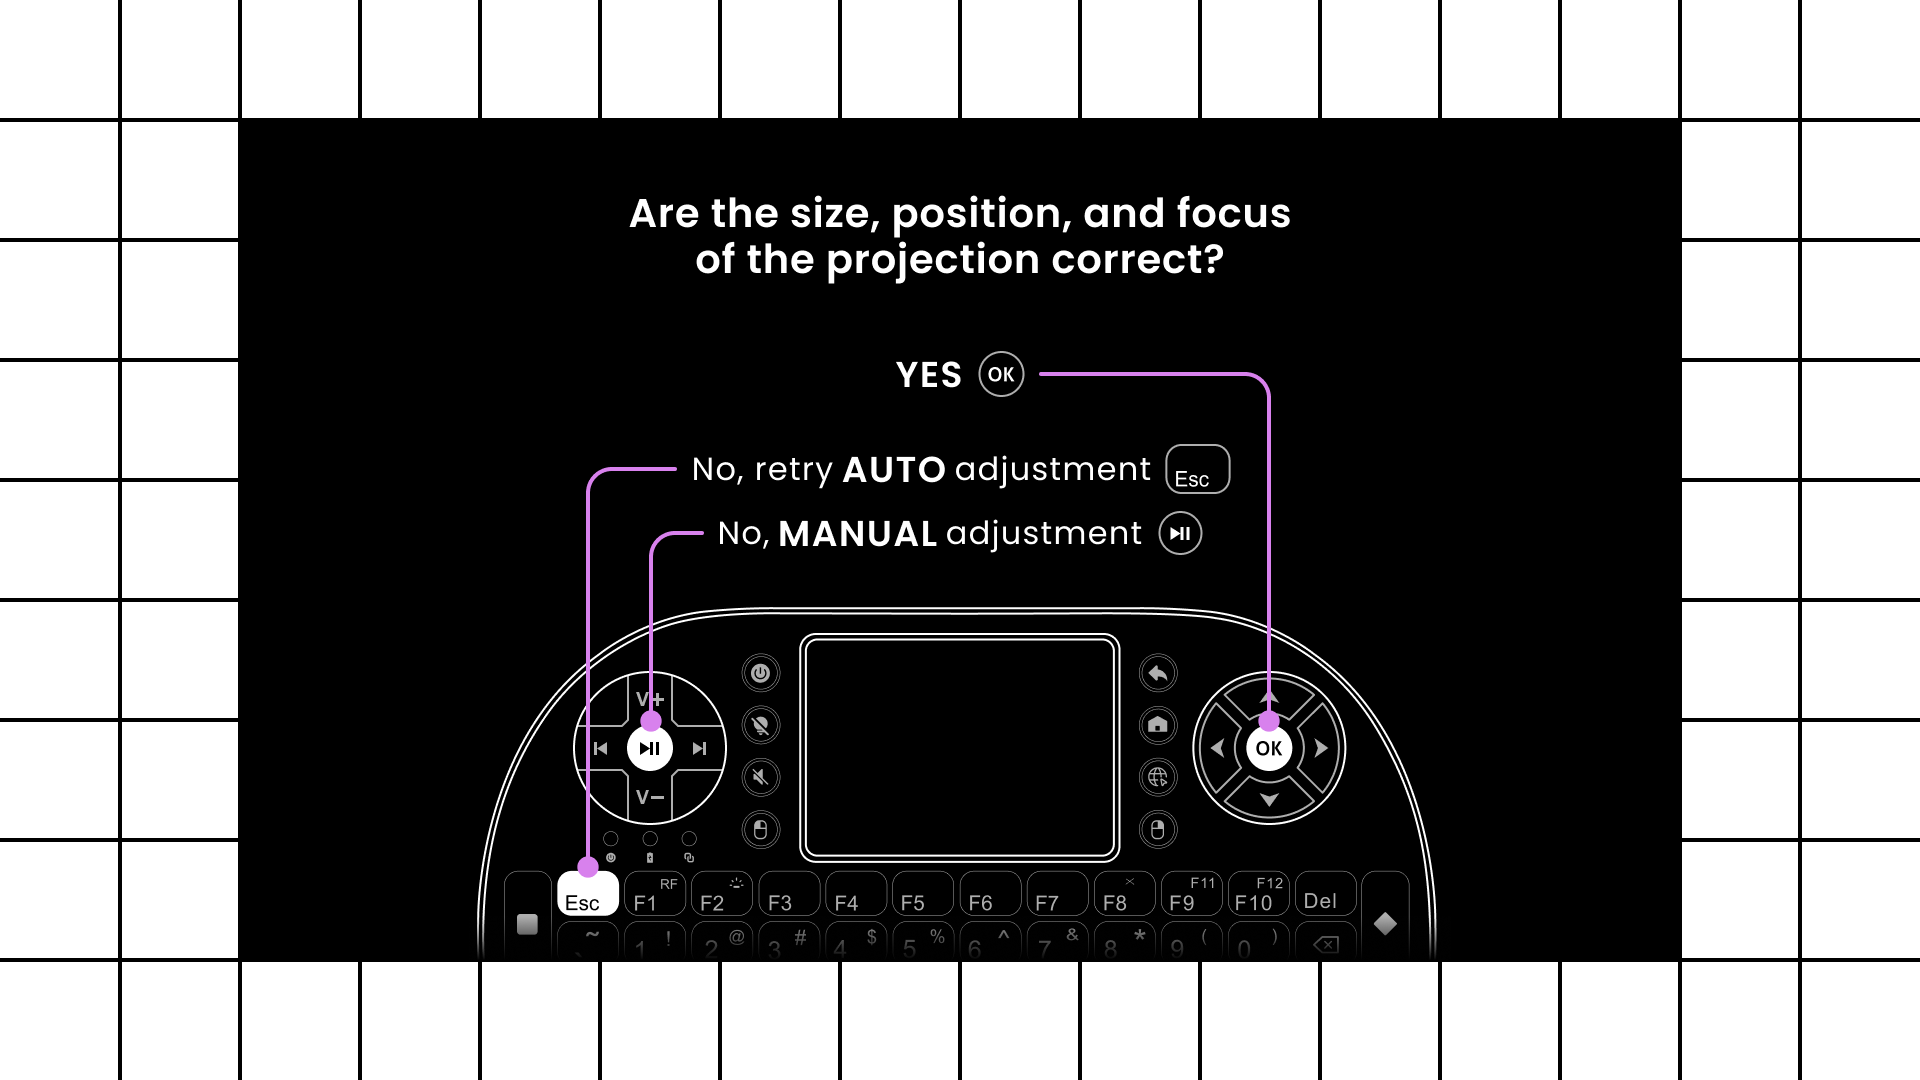
Once the auto-adjustment is complete, the following options will appear on screen :
-
If the size, positioning, and focus of the projection are satisfactory, press OK.
-
Otherwise, you can:
-
Press Esc to retry automatic adjustment.
-
Press Play to proceed with manual adjustment.
-
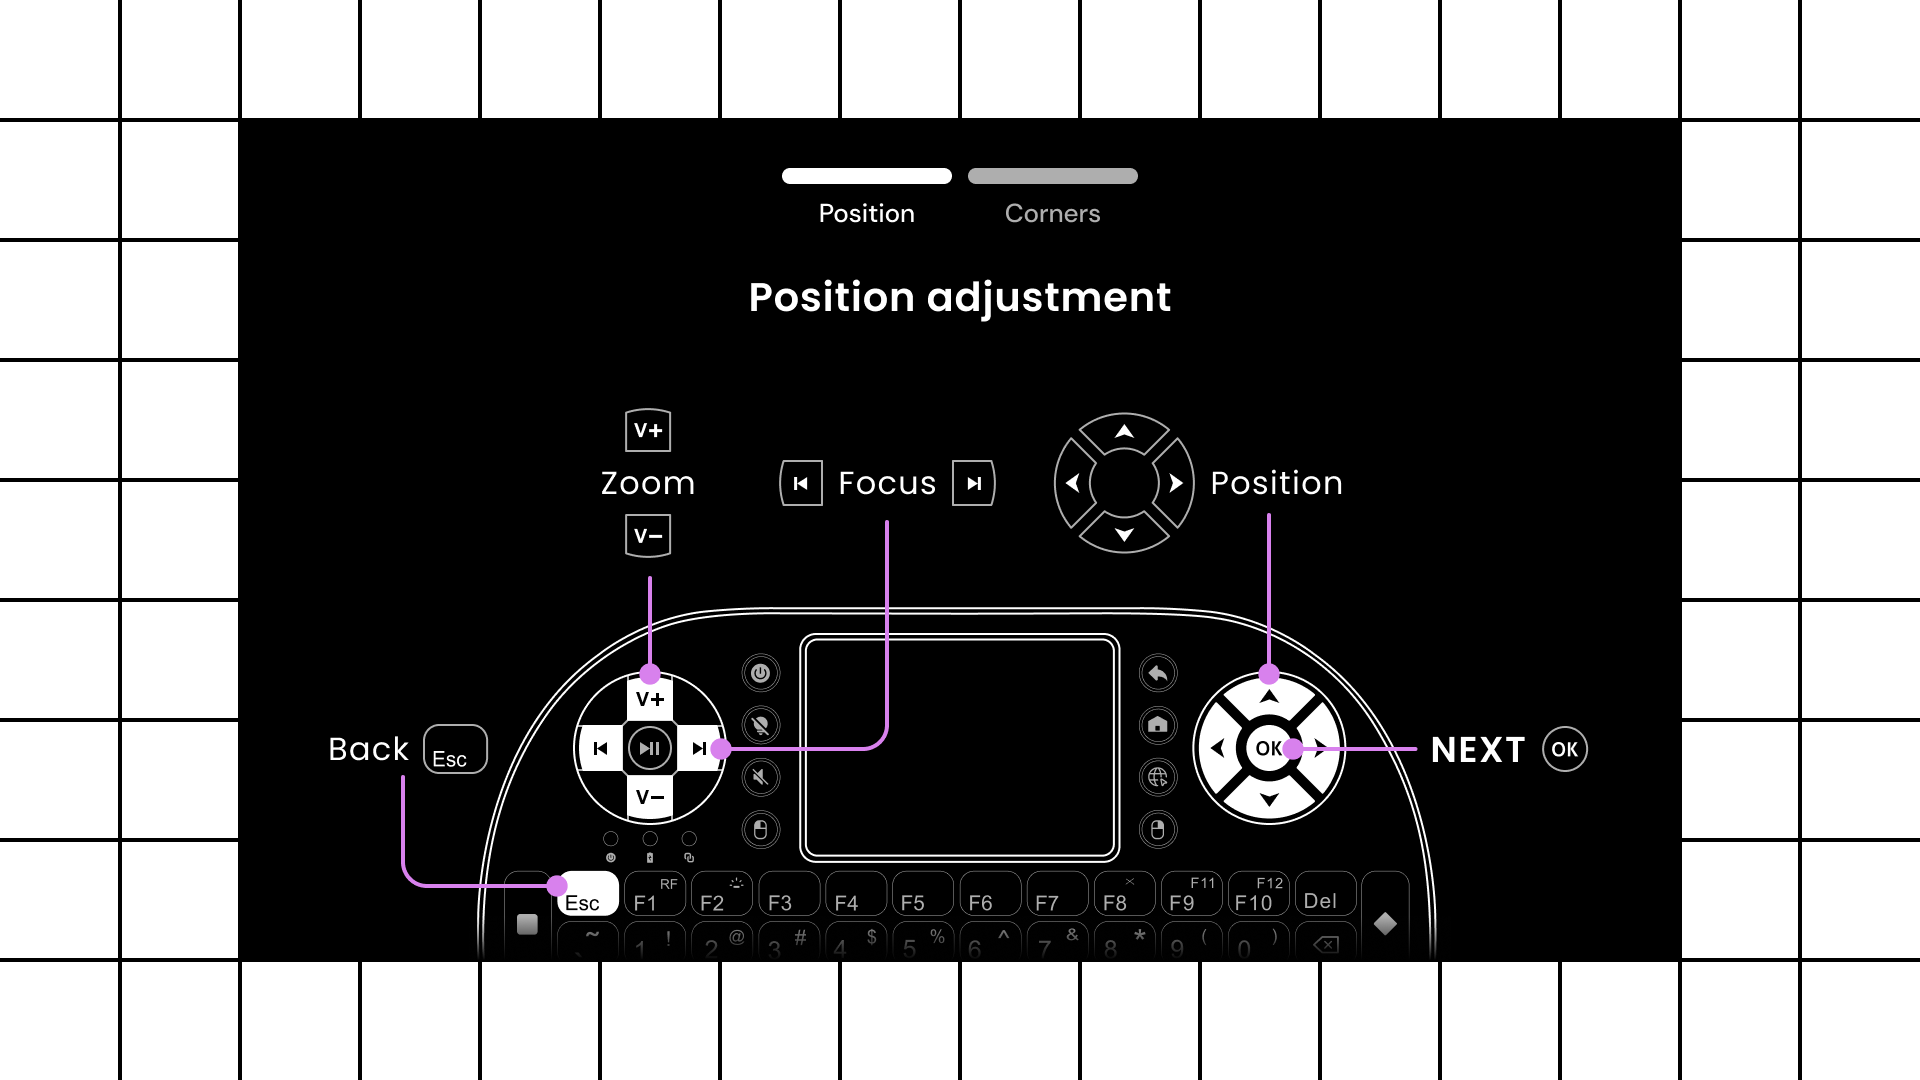
During manual adjustment, use the gamepad functions displayed on the screen to fine-tune the projection to your preference. Once finished, press OK to confirm.
How to use "Four Digit Adjust"
-
Using the projector remote, press the “Menu” button.
-
Select the “Setup” tab.
-
Choose “Keystone”.
-
Use the left and right arrows to select “Four Dots Adjust”.
-
Press “OK” a second time.
-
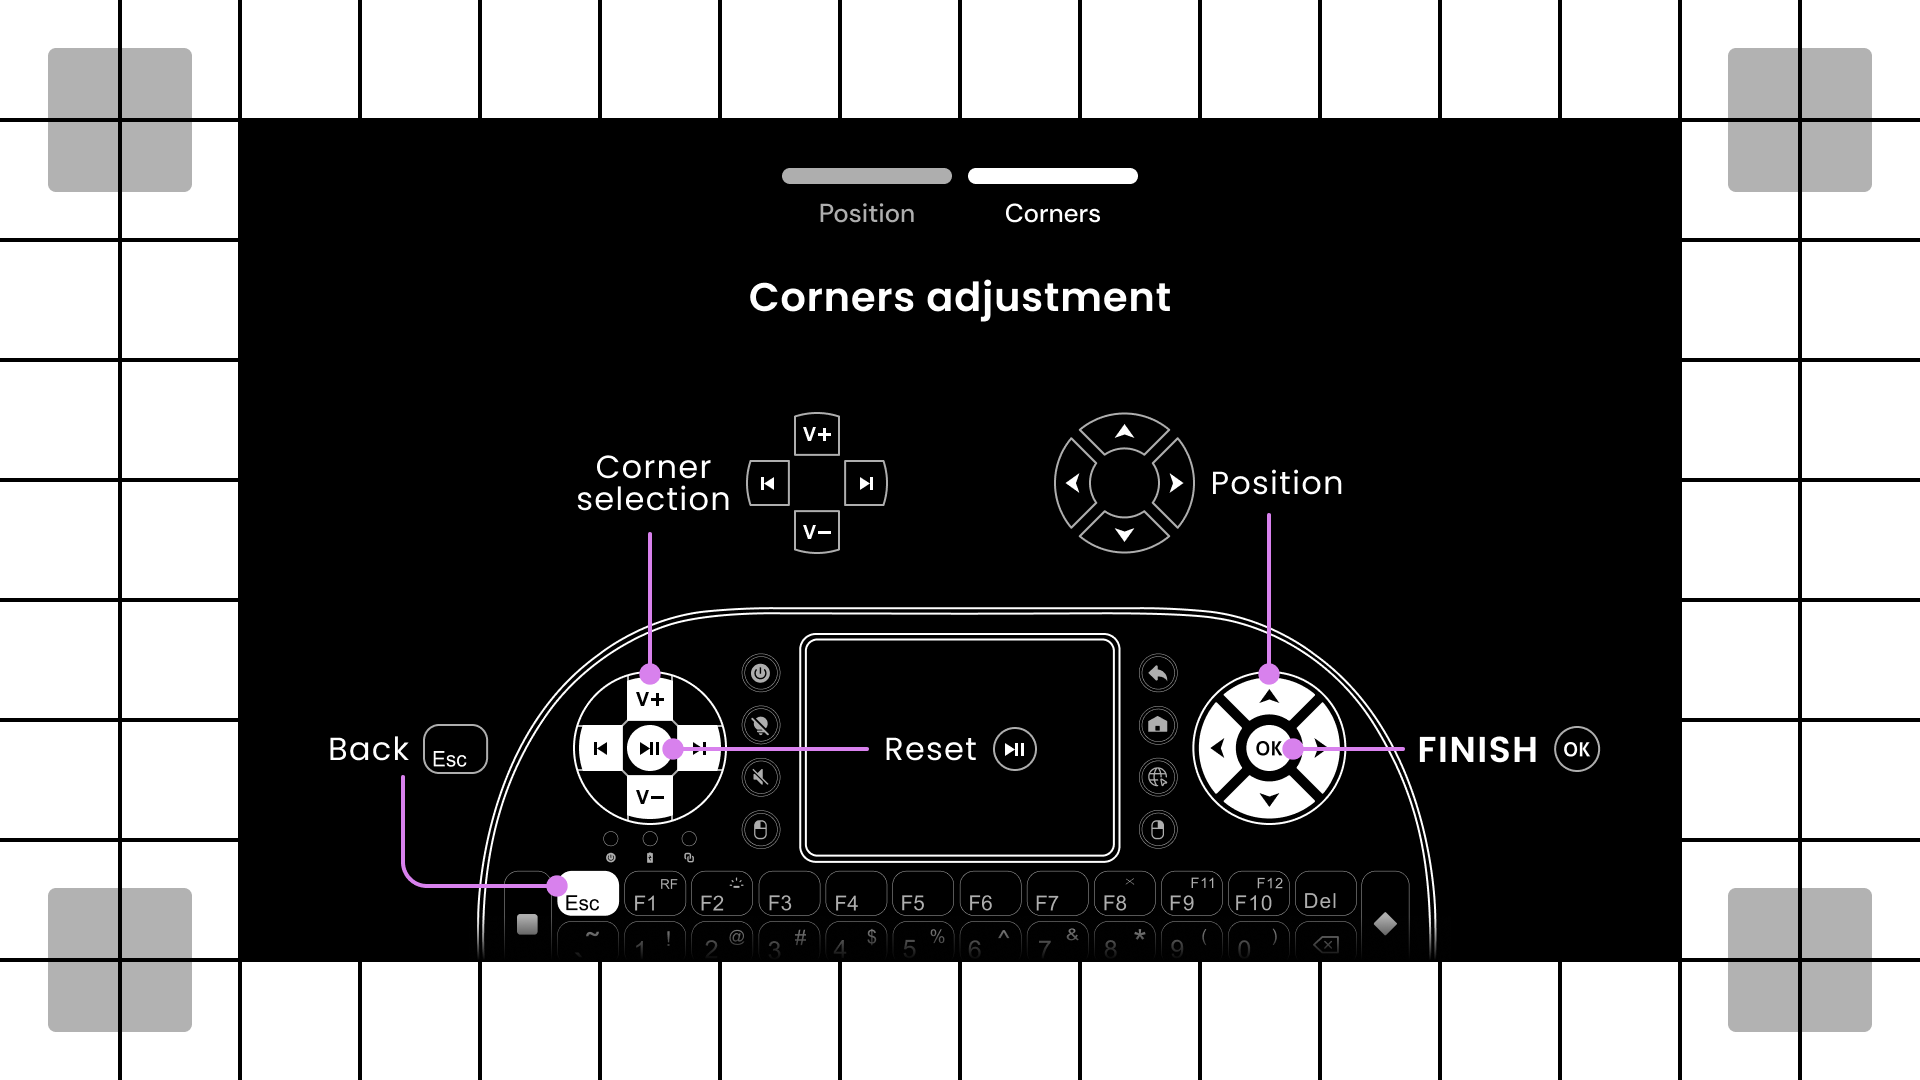
Select the corner you want to adjust, then use the remote arrows to move it.
-
Once it is positioned correctly, press “OK” to save the adjustment.
How to use "Zoom"
-
Using the projector remote, press the “Zoom” button.
-
Select “Zoom”.
-
Use the left and right arrows to adjust the image as needed.
How to use "Focus"
-
Using the projector remote, press the “Focus” button.
-
Select “Focus”.
-
Use the left and right arrows to adjust the sharpness of the image.
-
Using the projector remote, press the “Shift” button.
-
Select “Shift”.
-
Use the remote arrows to move the image to the desired position.
Still have questions? Contact us!